Prerequisites: Node js Installed on your system, Netlify Account Created, A Github Account Created, System Connected with your git hub.
With all these installed and account setup, we can go with tutorial.
Creating a new React site : Open your folder in terminal and run the following commands to create a new React app using Create React App:

This command create a new directory in your folder called app-name with the basic structure of react.

The commands Start the React site at the local URL: http://localhost:3000. Load this address in your browser.
Upload Your Project on Github:
Create new repositories using the new buttom.

Enter required field like repository name you can write your repository name ass per your project.

Create repository on click on create repository button

Copy commond and paste into your terminal to uplaod project into github.

Login Your Netlify Account and Craete A new Site using this Add new site button.

Select Import an existing project option.

And then select with githug deply button.

Here is a list of your repository select to start your deploy process.

Select branch to deploy.

Deploy your project click on deploy option.

After complete all these process your project is live.

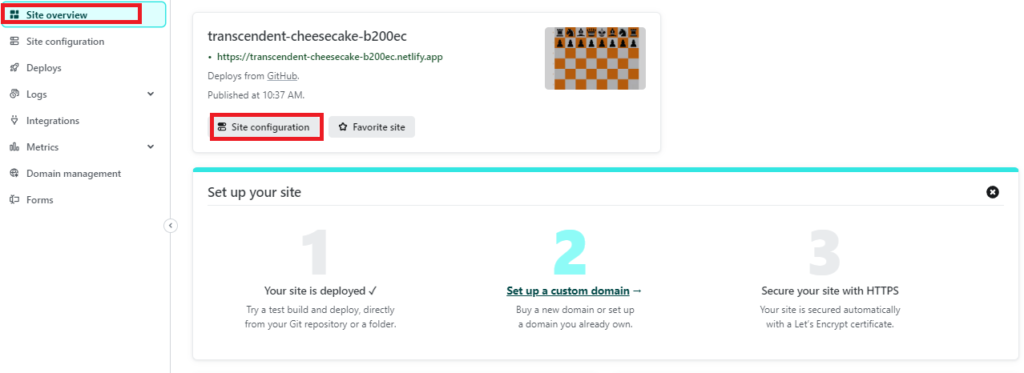
To Setup your project URL
Go to the site overview tab section and click on site configuration.

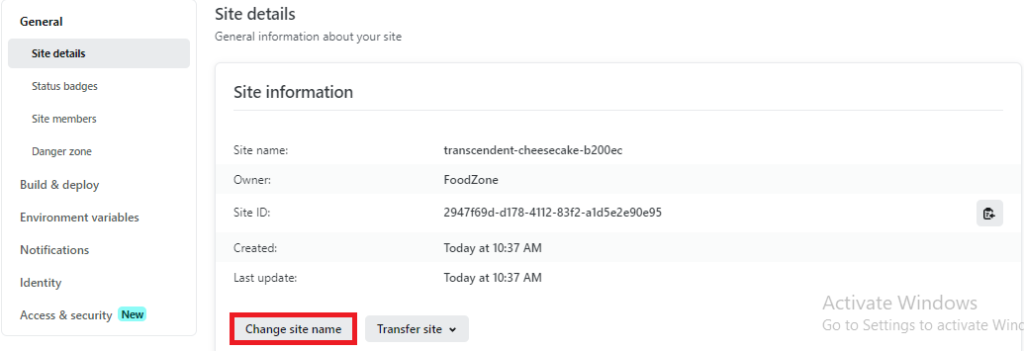
To change site name click the change site name button.

Congratulation! Afer change site name your project is completely upload on this URL.

If you liked this article, then please subscribe to our YouTube Channel for useful videos. You can also find us on Twitter and Facebook.


Write a Reply or Comment